search
Honda Dealers: Please enter the site from the iN or eMall system for dealer specific content and pricing

 Item shown may not be actual product.
Product and price information are subject to change without notice.
Discontinued
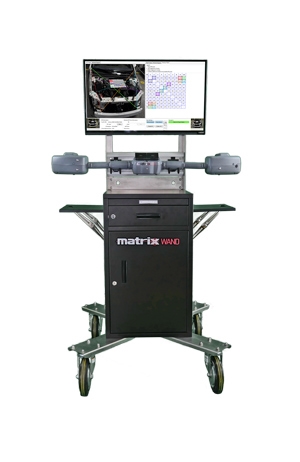
Matrix Wand™ Electronic Measuring System
Item Number: MEM171001
Supplier:
MATRIX ELECTRONIC MEASURING INC
Description
The Matrix Wand is the tool of choice for body shop professionals to quickly identify hidden damage and improve work flow through the shop. Tearing down each car to find hidden damage consumes valuable time on the frame machine, labor, and shop floor space. Within a matter of
minutes, every car that goes through the shop can be measured to identify hidden damage.
Features
- Blueprint the work to be carried out and the parts required
- Estimate and repair more accurately by identifying “damage” areas versus “trusted” areas or utilize the integrated Mitchell Database to compare points to factory specifications
- Provide documentation to insurance companies and customers to improve customer satisfaction and reduce liability
- Virtual 3D measuring allows precise measurement across any section
Benefits
- Can accurately measure X, Y, and Z under car, upper body and door openings for vehicle estimates
- Ensure accurate estimates the first time to reduce supplements while increasing efficiency and profitability throughout the repair process
- Calculations from the Matrix Wand and Repair Analysis Software are accurate within 1 mm, so you can be assured your measurements are spot on
Includes
- MEMSBC14301 Calibration Board
- MEMAK1025 Rechargeable Battery
- Matrix Wand
- Computer
- Wireless Mouse
- Printer
- 32" Monitor
- Cabinet
- All Necessary Cables
How it works (step-by-step):
- Image the vehicle - Use the target-less handheld Matrix Wand to take 3D Images of the vehicle with minimal tear down. Captured images can be used to measure: suspension, control arms, cradle positioning, toe angle, caster angle, camber angle, strut/knuckle symmetry, sensor placement, and gaps.
- Capture the data - Use Matrix’s proprietary data collection software to download the 3D images and data points to your computer. This process is quick and easy giving you the ability to capture visible and hidden damage on the fly.
- Measure fast and accurately - Use the Repair Analysis Software to start measuring any point on the vehicle. Zoom in on the image and select any point you would like to measure.
- Document and blueprint - Document the damage to share with insurance companies and customers. Blueprint the job to assure work is carried out and parts ordered with the greatest efficiency.
- Repair and verify - Carry out the repair and use the Matrix Wand to assist with accuracy. This includes sensor angle positioning, hanging doors, verifying alignment, and checking suspension. Capture a final measurement to verify the car is repaired back to specification and document to minimize liability.
Warranty
One year limited warranty against defects in material and workmanship.
Product Specifications
- Camera Accuracy: +/- 1 mm
- Estimated Battery Life: : 150 photos
- Operational Temperature Range: : 41 - 104° F (5 - 40° C)
- Power Requirements: 110VAC. /60 Hz
- Shipping Crate Size: : 36"W x 42"H x 62"L (914 mm W x 1067 mm H x 1575 mm L)
- Shipping Crate Weight: : 425 lbs.
- Wand Size: 7"W x 5"H x 46"L (178 mm W x 127 mm H x 1168 mm L)


